Note: The following prior to starting your backup:
- If you are planning on doing the backup to Floppy Disk, have the required amount of disks ready. You can estimate if you know how big the files are and just add the amounts together. Each Floppy can store approximately 1.4 Meg.
- If you are planning on doing the backup to a CD, then you need to do the backup to a file on the Hard drive, and then copy that file to the CD using the appropriate CD burning software.
1.
Open Backup program by choosing Start | All Programs |
Accessories | System Tools | Backup. This will open the Backup program, and
present you with the following dialogue box:
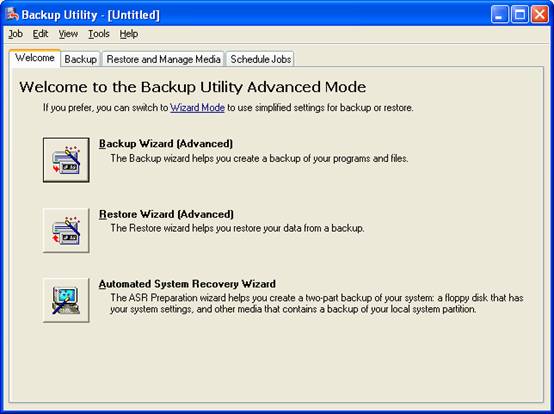
2. If you want to use the Wizard, that will guide you through the process, but it does not give the best options for saving your particular backup job. Also, the Wizard dialogue boxes can not be stretched out as much as the manual ones, and the manual way is actually simpler if you know how to do it. Therefore we will only cover the manual way. The first step is to click on the Backup Tab. This will give you the following screen.
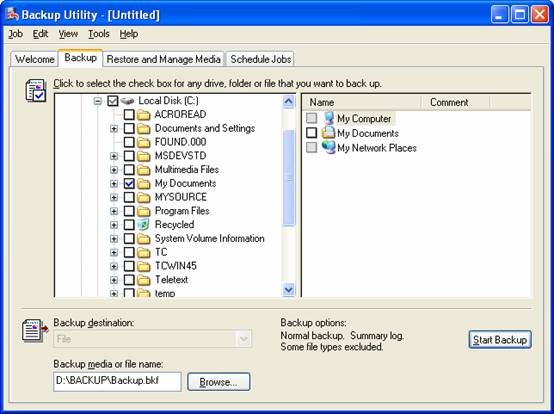
3. Browse through the folders, and tick the files and/or folders that you want to backup. I have ticked the “My Documents” folder in the above example. Note that if you have already carried out this procedure, then you can load in the previously saved selections of folders and/or files, using the “Load Selections” option under the Job menu.
4. Click on the Backup media or file name at the bottom left of the box, to select a place for the backup file. This is stored each time, so you may want to confirm or change it if it is not want you want each time you do a backup.
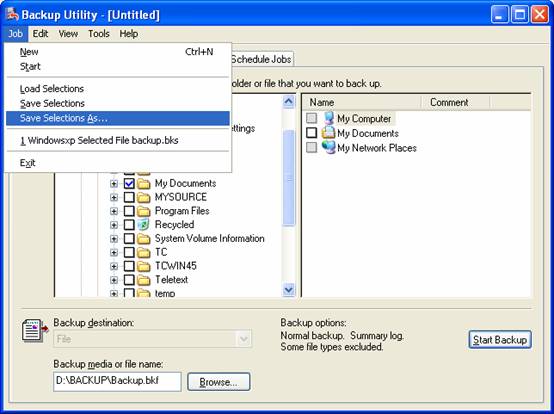
5. Click on Job | Save Selections to save the selected folders and files for future backups, as shown in the following screen.
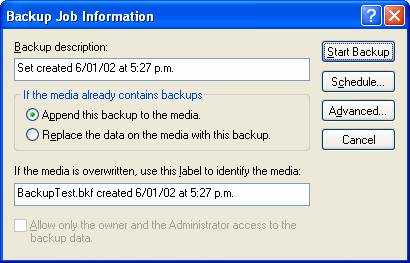
Choose a place and name for the selections, so that you can easily remember and
find the file next time. Just choose the location and type in the filename. The
extension (*.bks) is added by the system.
6. Click on Start Backup in the bottom right corner to begin. This will give you the following screen:
If you want to automatically schedule, then do it here, otherwise just click
Start Backup.
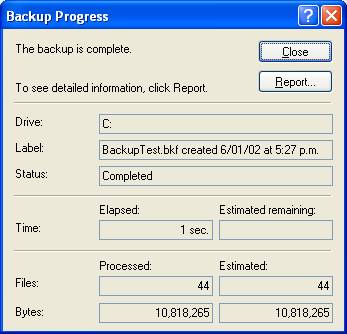
When finished, the following screen will be shown. You can view the report, or simply close it.
As mentioned above, if you are planning on storing the backup on CD, then you need to do that now.